


Monday, December 8, 2008
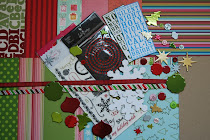
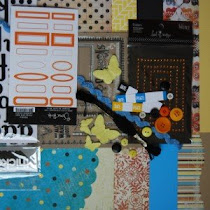
Here are some fabulous projects sent to me from one of our guest designers, Danielle Holsapple.


 Love how Danielle used the KI Sheer here.
 Pam Callaghan was kind enough to provide directions with her cute ornament frame, so here they are if you want to make your own:
1. I cut a large circle out of cardboard (for a study background) using my Coluzzle. Any circle cutter will work. Using that same circle cutter I cut out a red backing and then a slightly smaller striped circle.
2. To create the circle text, I used a text path from Two Peas: http://kraftgirlkits.com/.tools/atmail/current/parse.php?redirect=http%3A%2F%2Fwww.twopeasinabucket.com%2Fshop%2F54689%2F . I printed that out onto the kraft cardstock. 3. I cropped my photo with the circle cutter and mounted that to the background.
4. For the ribbon, I taped the ribbon to red tag and also the cardboard backing (I used the red tag mostly for decoration). I tied the ribbon at the top so it would be easy to attach to the Christmas tree.
5. Lastly, I glued on more of the embellishments to my ornament.
*For step 2, here are instructions on how to print text in a circle: Instructions
 Hope everyone had a great weekend!!!
Subscribe to:
Post Comments (Atom)


4 comments:
such gorgeous inspiration!!
Beautiful projects this month!! Great that you've included instructions!
Fabulous cards and thanks Pam for the step by step!
Did someone say "Kraft"?? hehe.
OH MY - I am a Kraft girl through and through.
I was in the 2 peas members gallery when I seen a project by someone and it had "kit by Kraft girl kits" in the description. I had to google it straight away and I found you - yay!
Off to have a little more of a look around your site. Then to get me a kit sometime soon...xx
Go kraft *wink*
xx
Post a Comment